Jump to content
  • Join SGMerc for Exclusive Perks!

    Welcome to SGMerc - the largest Mercedes-Benz site for Owner and Enthusiasts in Singapore!

    SGMerc is the official club for all current & previous owners of Mercedes-Benz cars in Singapore. SIGN UP FOR YOUR FREE ACCOUNT TODAY!

    You are currently viewing our forum as a guest, which gives you limited access to view most discussions and access our other features. By joining our community, you will have access to post topics, communicate privately with other members (PM), respond to polls, upload content and access many other special features. Registration is free, fast and simple, join us today!

W126 DIY ICE install


owm

Recommended Posts

ZoomButt.gif

Yet another weekly DIY session, this time to update the ICE setup in the W126. My requirements were simple, a good SQ head unit that can accept USB/SD input, does not look out-of-place in the 80s interior and easy-to-drive, dynamic and affordable loudspeakers.

As such, I ended up with this simple setup of:

1. Nakamichi NA200R head unit

2. Infinity Kappa 4x6" co-axial dash mount speakers

3. Infinity Kappa 6.5" co-axial rear parcel shelf speakers

Installation was problem-free but I took the time to tidy up the wiring and remove all extraneous cabling plus vacuuming and wiping down the exposed effected areas which was covered with lots of coconut husks fragments and built-up dirt over 24 years.

No canopy/umbrella/awning/shelter? Next best thing, have a fan blowing at top speed at you while you fry under the unrelenting sun from 1.30pm ~ 5pm:

7425205940_92f13d23cd_z.jpg

Have some non-OEM wiring/relays/fuses which I have no idea what they control but did not take out...for now:

7425205480_54ec4e0c23_z.jpg

Had to remove the side carpet to remove the old wiring of the Kenwood head unit and see how much the stock wiring harness was butchered. This is actually a good way to have access to the light bulbs behind the A/C panel especially the temperature turn wheel.

Test run and sorting which speaker cable pairs were the right and left rear which I re-used:

7425205214_f448712d30_z.jpg

Rear right speaker installed. Did not remove the damn rear seat back due to my bad back as I did not have the strength to lift it off. Still managed to remove the speaker covers with some jiggling:

7425204288_2be6c88312_z.jpg

Finally installed and looks boss:

7425204716_6794f194e8_z.jpg

Still have to tweak the color setting a little to match the ambient lighting:

7425204058_194836404b_z.jpg

Finally I can enjoy better quality music on USB/SD!

7341297598_97c7140d08.jpg

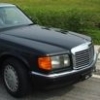
1988 W126 300SE - Schwartz-Blau with grey velour interior/trim

ZoomButt.gif

Link to comment
Share on other sites

  • Replies 1
  • Created
  • Last Reply

Top Posters In This Topic

Top Posters In This Topic

Converted the dash speakers to under-mounting so I can use back the OEM speaker cover for a stock look. Driver side was easy, just had to take out the instrument cluster and insert the speaker into the cavity without much issue.

Passenger side was pretty tight as the air ducts to the two vents blocked the way:

7429940978_74f64e8148.jpg

Had to remove the vents and gave them a thorough cleaning in and out.

Also vacuumed and wiped down the exposed area through the glovebox:

7429941386_746f86cda7.jpg

Pressure-held in place through the use of foam baffles:

7429942148_6325ef0467.jpg

7341297598_97c7140d08.jpg

1988 W126 300SE - Schwartz-Blau with grey velour interior/trim

ZoomButt.gif

Link to comment
Share on other sites

Join the conversation

You can post now and register later. If you have an account, sign in now to post with your account.

Guest
Reply to this topic...

×   Pasted as rich text.   Paste as plain text instead

  Only 75 emoji are allowed.

×   Your link has been automatically embedded.   Display as a link instead

×   Your previous content has been restored.   Clear editor

×   You cannot paste images directly. Upload or insert images from URL.


  • download.jpg

×
×
  • Create New...